


Quick Xmas List

Price: FREE

Quick Xmas List help you keep track of your Xmas shopping list.
Features
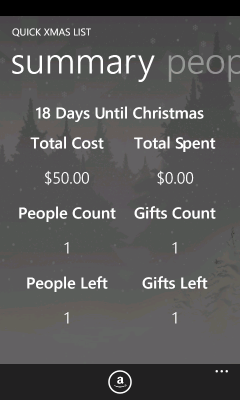
- Summary screen shows:
- Days until Xmas
- Gift cost total
- Amount spent so far
- People count
- Gift count
- People remaining
- Gifts remaining
- Add unlimited people
- Save notes about person
- Add unlimited gifts per person
- Name: Can be empty if needed
- Price
- Url
- Notes
- Can be marked as bought.
- Wish List
- Create a list of things you want and email it to your contacts.
- Live Tile support
- Pin app to home screen to view remaining gift & people count as well as Xmas countdown.
- Secondary tile shows Xmas countdown only. Great to pin next to your calendar.
How to use
Adding a new person
- Open App.
- Swipe over to the “people” screen.
- Tap the “add” icon at the bottom.
- Fill in name and optionally, any info/notes you want. This is a great place to put gift ideas or likes.
- Tap the “save” icon at the bottom.
Deleting a person
- Open App.
- Swipe over to the “people” screen.
- Tap and hold on person you wish to delete.
- Click “Ok” on confirmation screen.
NOTE: Deleting a person will delete all gifts associated with them. Deleting a person cannot be undone.
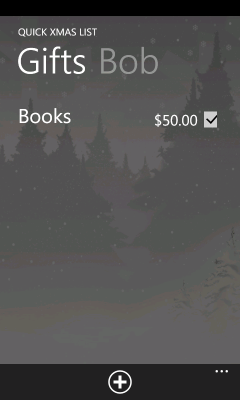
Adding a new gift
- Open App.
- Swipe over to the “people” screen.
- Tap on an existing person.
- Swipe over to the “Gifts” screen.
- Tap the “add” icon at the bottom.
- Fill in name. You can leave name blank if necessary.
- Price is optional but it helps to fill it in if you want to keep track of the estimated total shopping costs.
- Url field is optional. Currently it is only for reference if shopping online.
- Info field is optional. This is a good place to make notes about this gift.
- When done, tap the back button. Gift is automatically saved.
Deleting a gift
- Open App.
- Swipe over to the “people” screen.
- Tap on an existing person.
- Swipe over to the “Gifts” screen.
- Tap and hold on gift you wish to delete.
- Click “Ok” on confirmation screen.
NOTE: Deleting a gift cannot be undone.
Marking a gift as purchased
- Open App.
- Swipe over to the “people” screen.
- Tap on an existing person.
- Swipe over to the “Gifts” screen.
- Locate gift.
- Check the check box next to gift.
- Gift is automatically saved.
Add Xmas countdown tile to home screen
- Open App.
- Expand the menu by tapping the “…” in the bottom right corner.
- Tap the”Add Xmas Countdown Live Tile” menu item.
Tile Notes:
- Tile only works between December 1st and December 25th. The first time it goes to update on the 26th, the tile will be removed.
- Since the background worker only runs every 30 min, there may be a delay at midnight of up to 29 min before it updates to the correct day.
- The countdown tile does not require the main tile to be pinned. It can be pinned anywhere on the home screen by itself.
- Disabling the background task in the phones’ settings area will stop the tiles from updating and will show the same info as when it was disabled. Please do not disable the task.
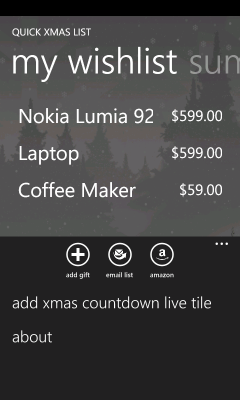
Adding item to wish list
- Open App.
- Swipe over to the “wish list” screen.
- Tap the “add” icon at the bottom.
- Fill in name. You can leave name blank if necessary.
- Price is optional. Included in email.
- Url field is optional. Included in email.
- Info field is optional. Included in email.
- When done, tap the back button. Gift is automatically saved.
Deleting a wish list item
- Open App.
- Swipe over to the “wish list” screen.
- Tap and hold on wish list item you wish to delete.
- Click “Ok” on confirmation screen.
NOTE: Deleting a gift cannot be undone.
Sharing your wish list
- Open App.
- Swipe over to the “wish list” screen.
- Tap the “email list” icon at the bottom.
- Choose recipient from contacts. You may need to choose a specific address is the contact has more than one.
- If prompted, choose sending account.
- Confirm you are happy with the email and make any changes.
- Send email.
Screen Shots
 |
 |
 |
 |
 |
 |
 |
 |
 |
 |
 |
 |
 |
 |
 |
 |
 |
 |
 |
 |
 |
 |
 |
 |
 |
 |
 |